Framework Tutorial
Set up Automation
Overview
To set up the automation pipeline we need to:
- Push your repository.
- Set up pipeline credentials.
- Add the pipeline file.
- Follow the GitOps process.
Github is used for the step-by-step instructions. But you can use other Git hosting and CI/CD providers too. The required steps tend to be similar.
Example pipelines for other CI/CD systems are available on Github.
Push your repository
-
Create the remote repository
Create a new repository and give it a descriptive name. For example
infrastructure-automation.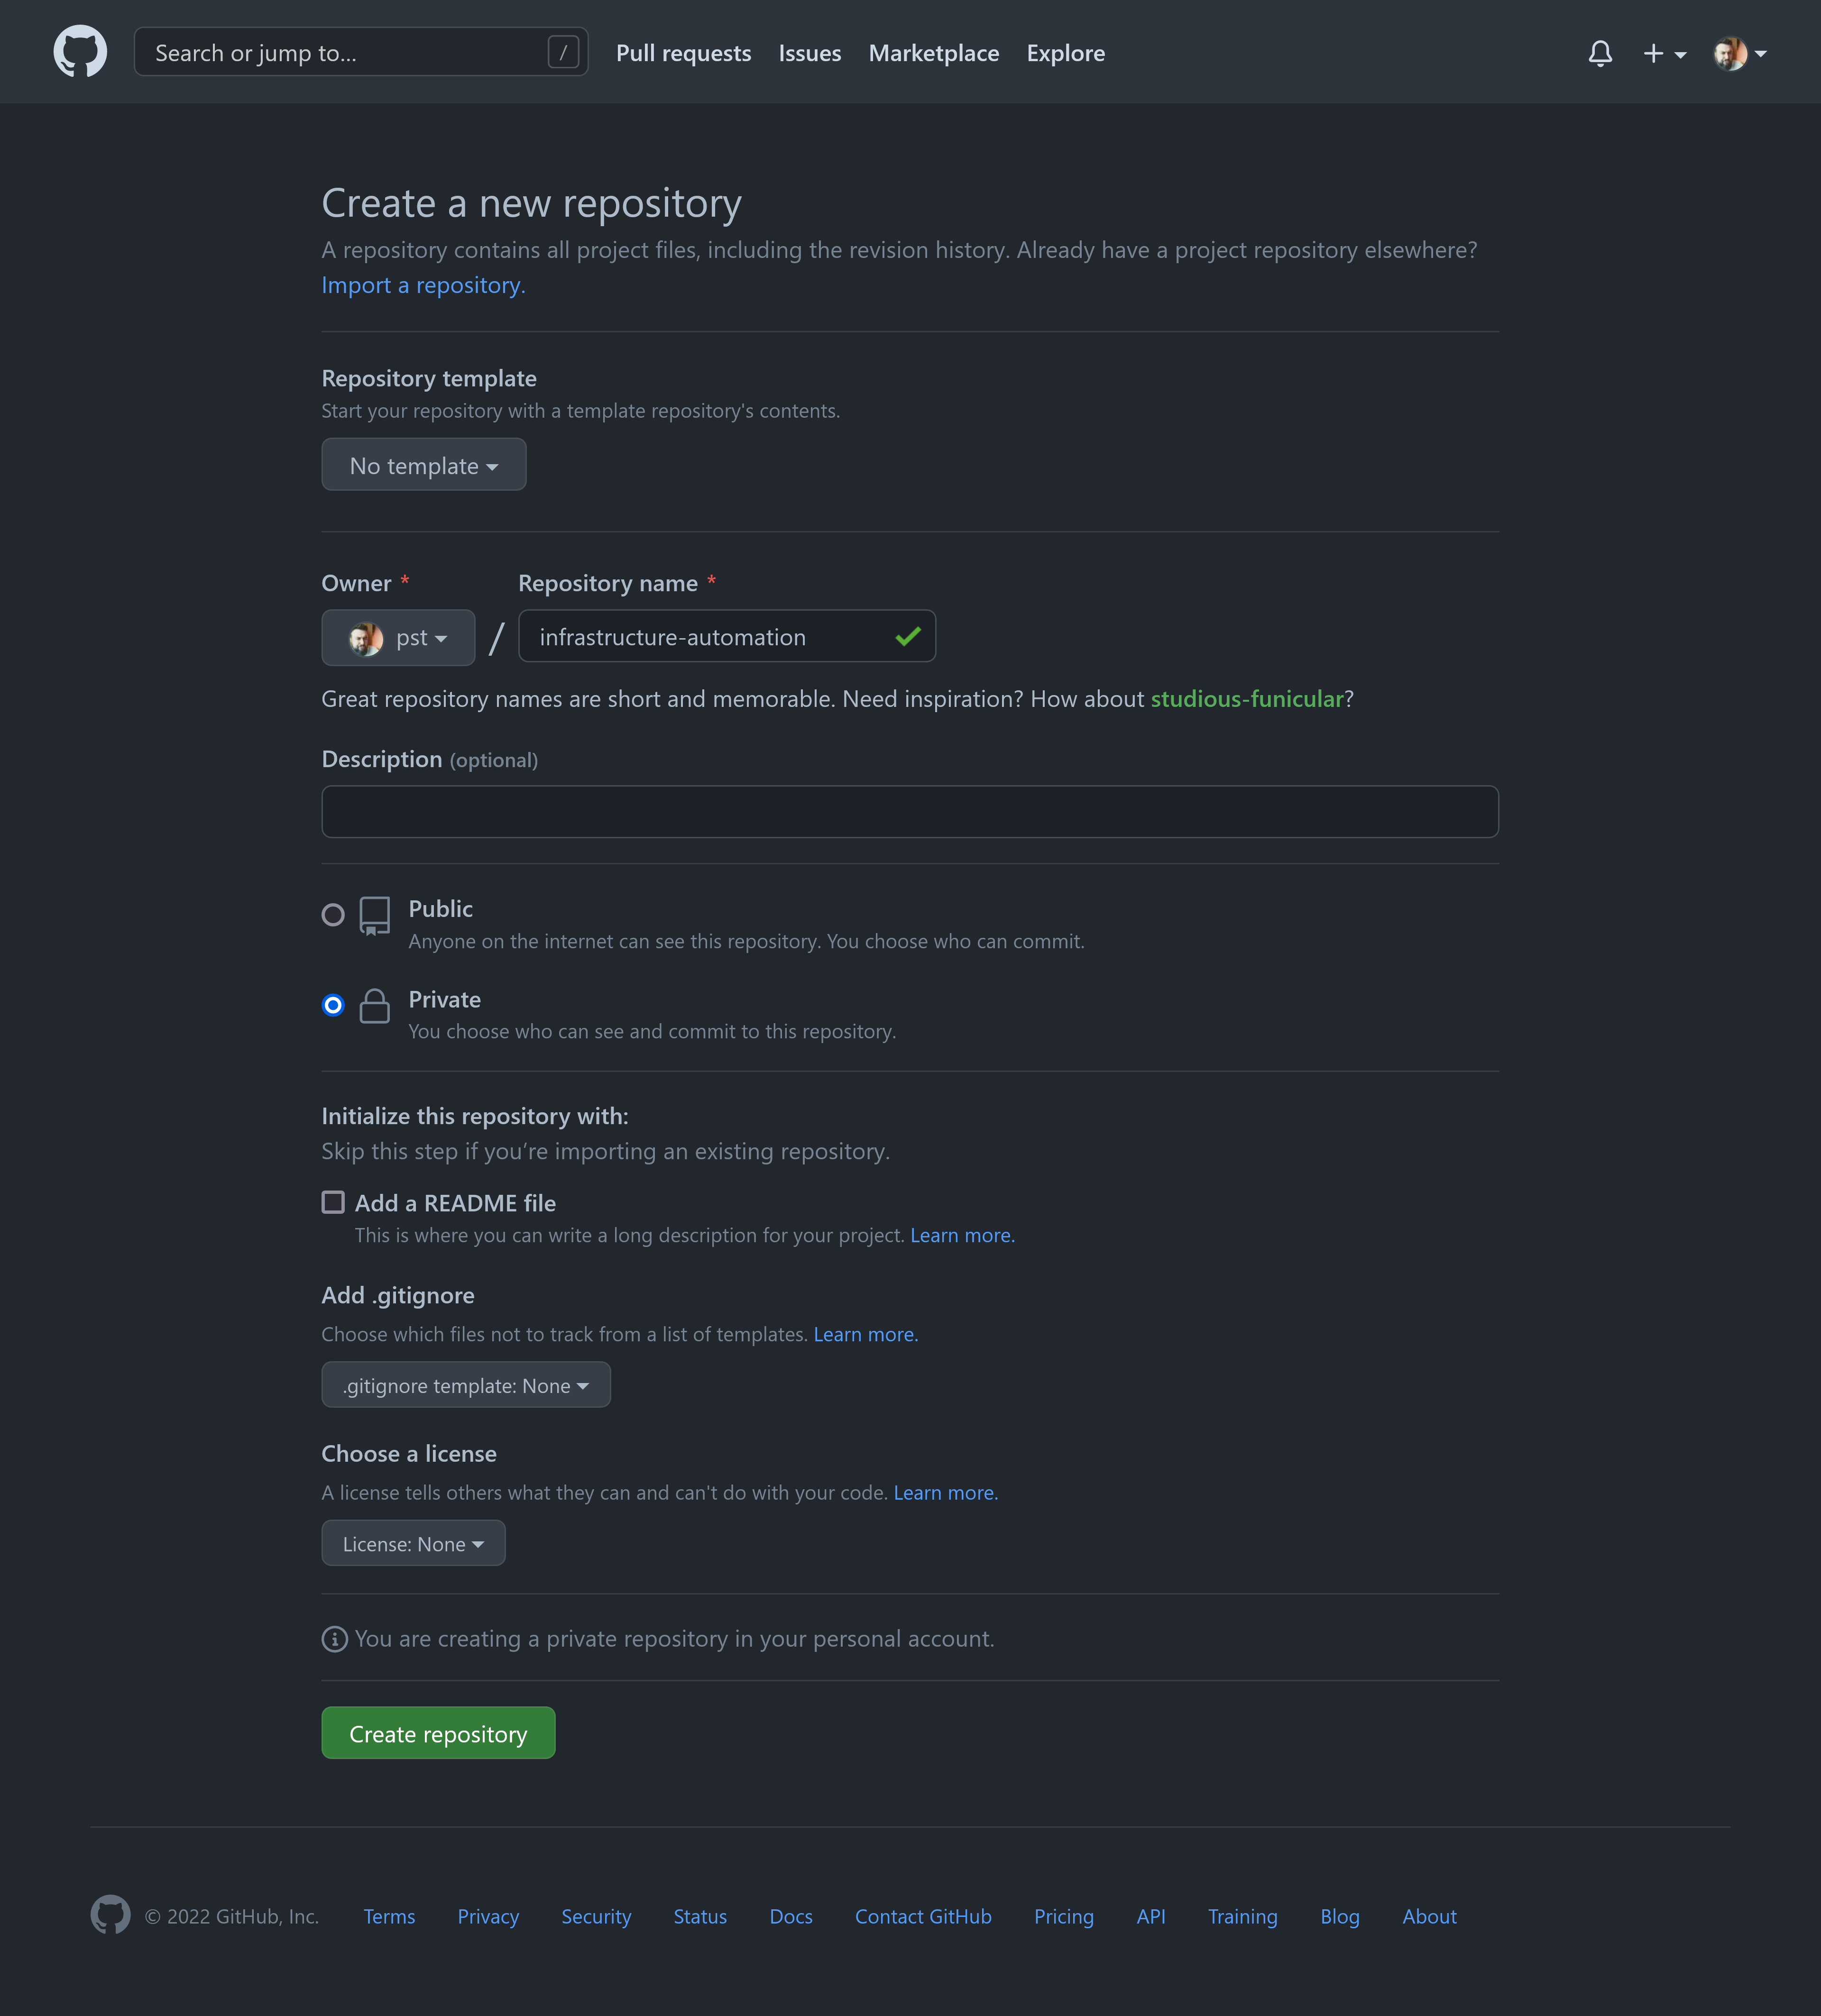
-
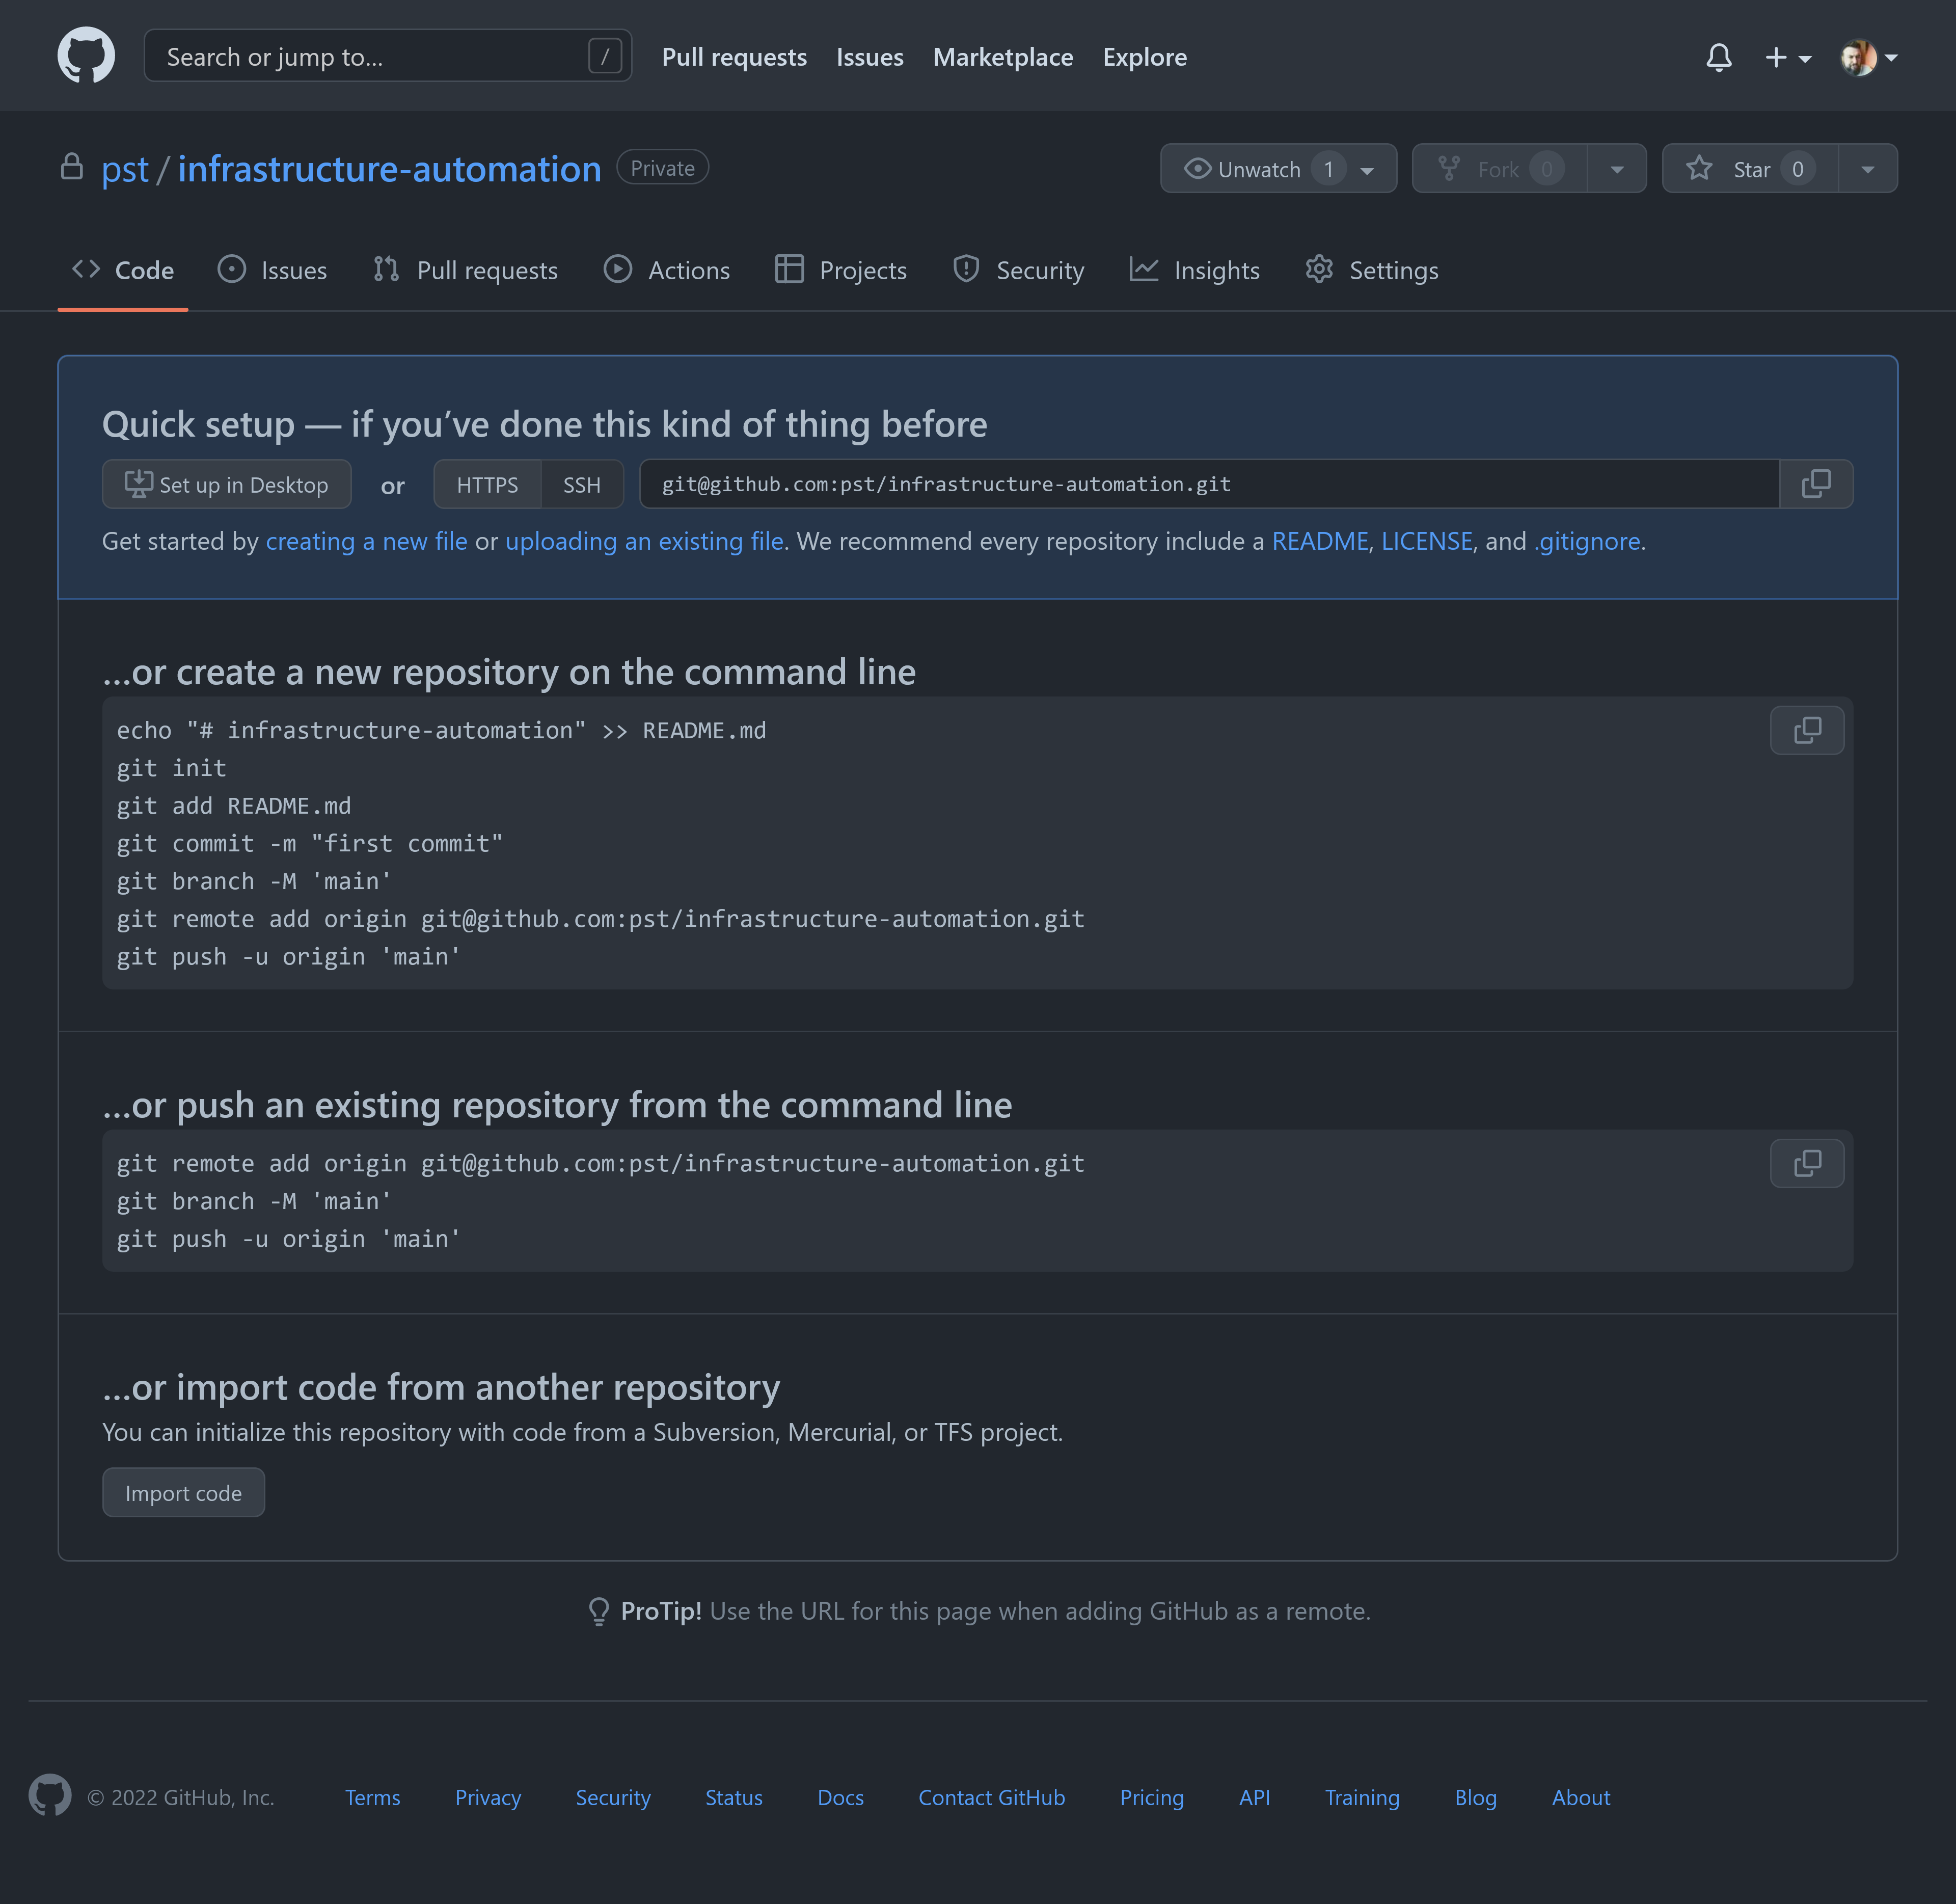
Push the repository
Follow the instructions for the second option to push your existing repository.
Set up pipeline credentials
We need to provide the credentials to the service accounts we created in the previous step to our pipeline. For this, again, follow the step for each cloud provider you're using.
-
Encode the AWS credentials file using base64.
cat .user/.aws/credentials | base64 -w 0 && echo -
Find secrets under your repository settings and add a secret named
KBST_AUTH_AWSwith the base64 encoded credentials from the previous step as the value.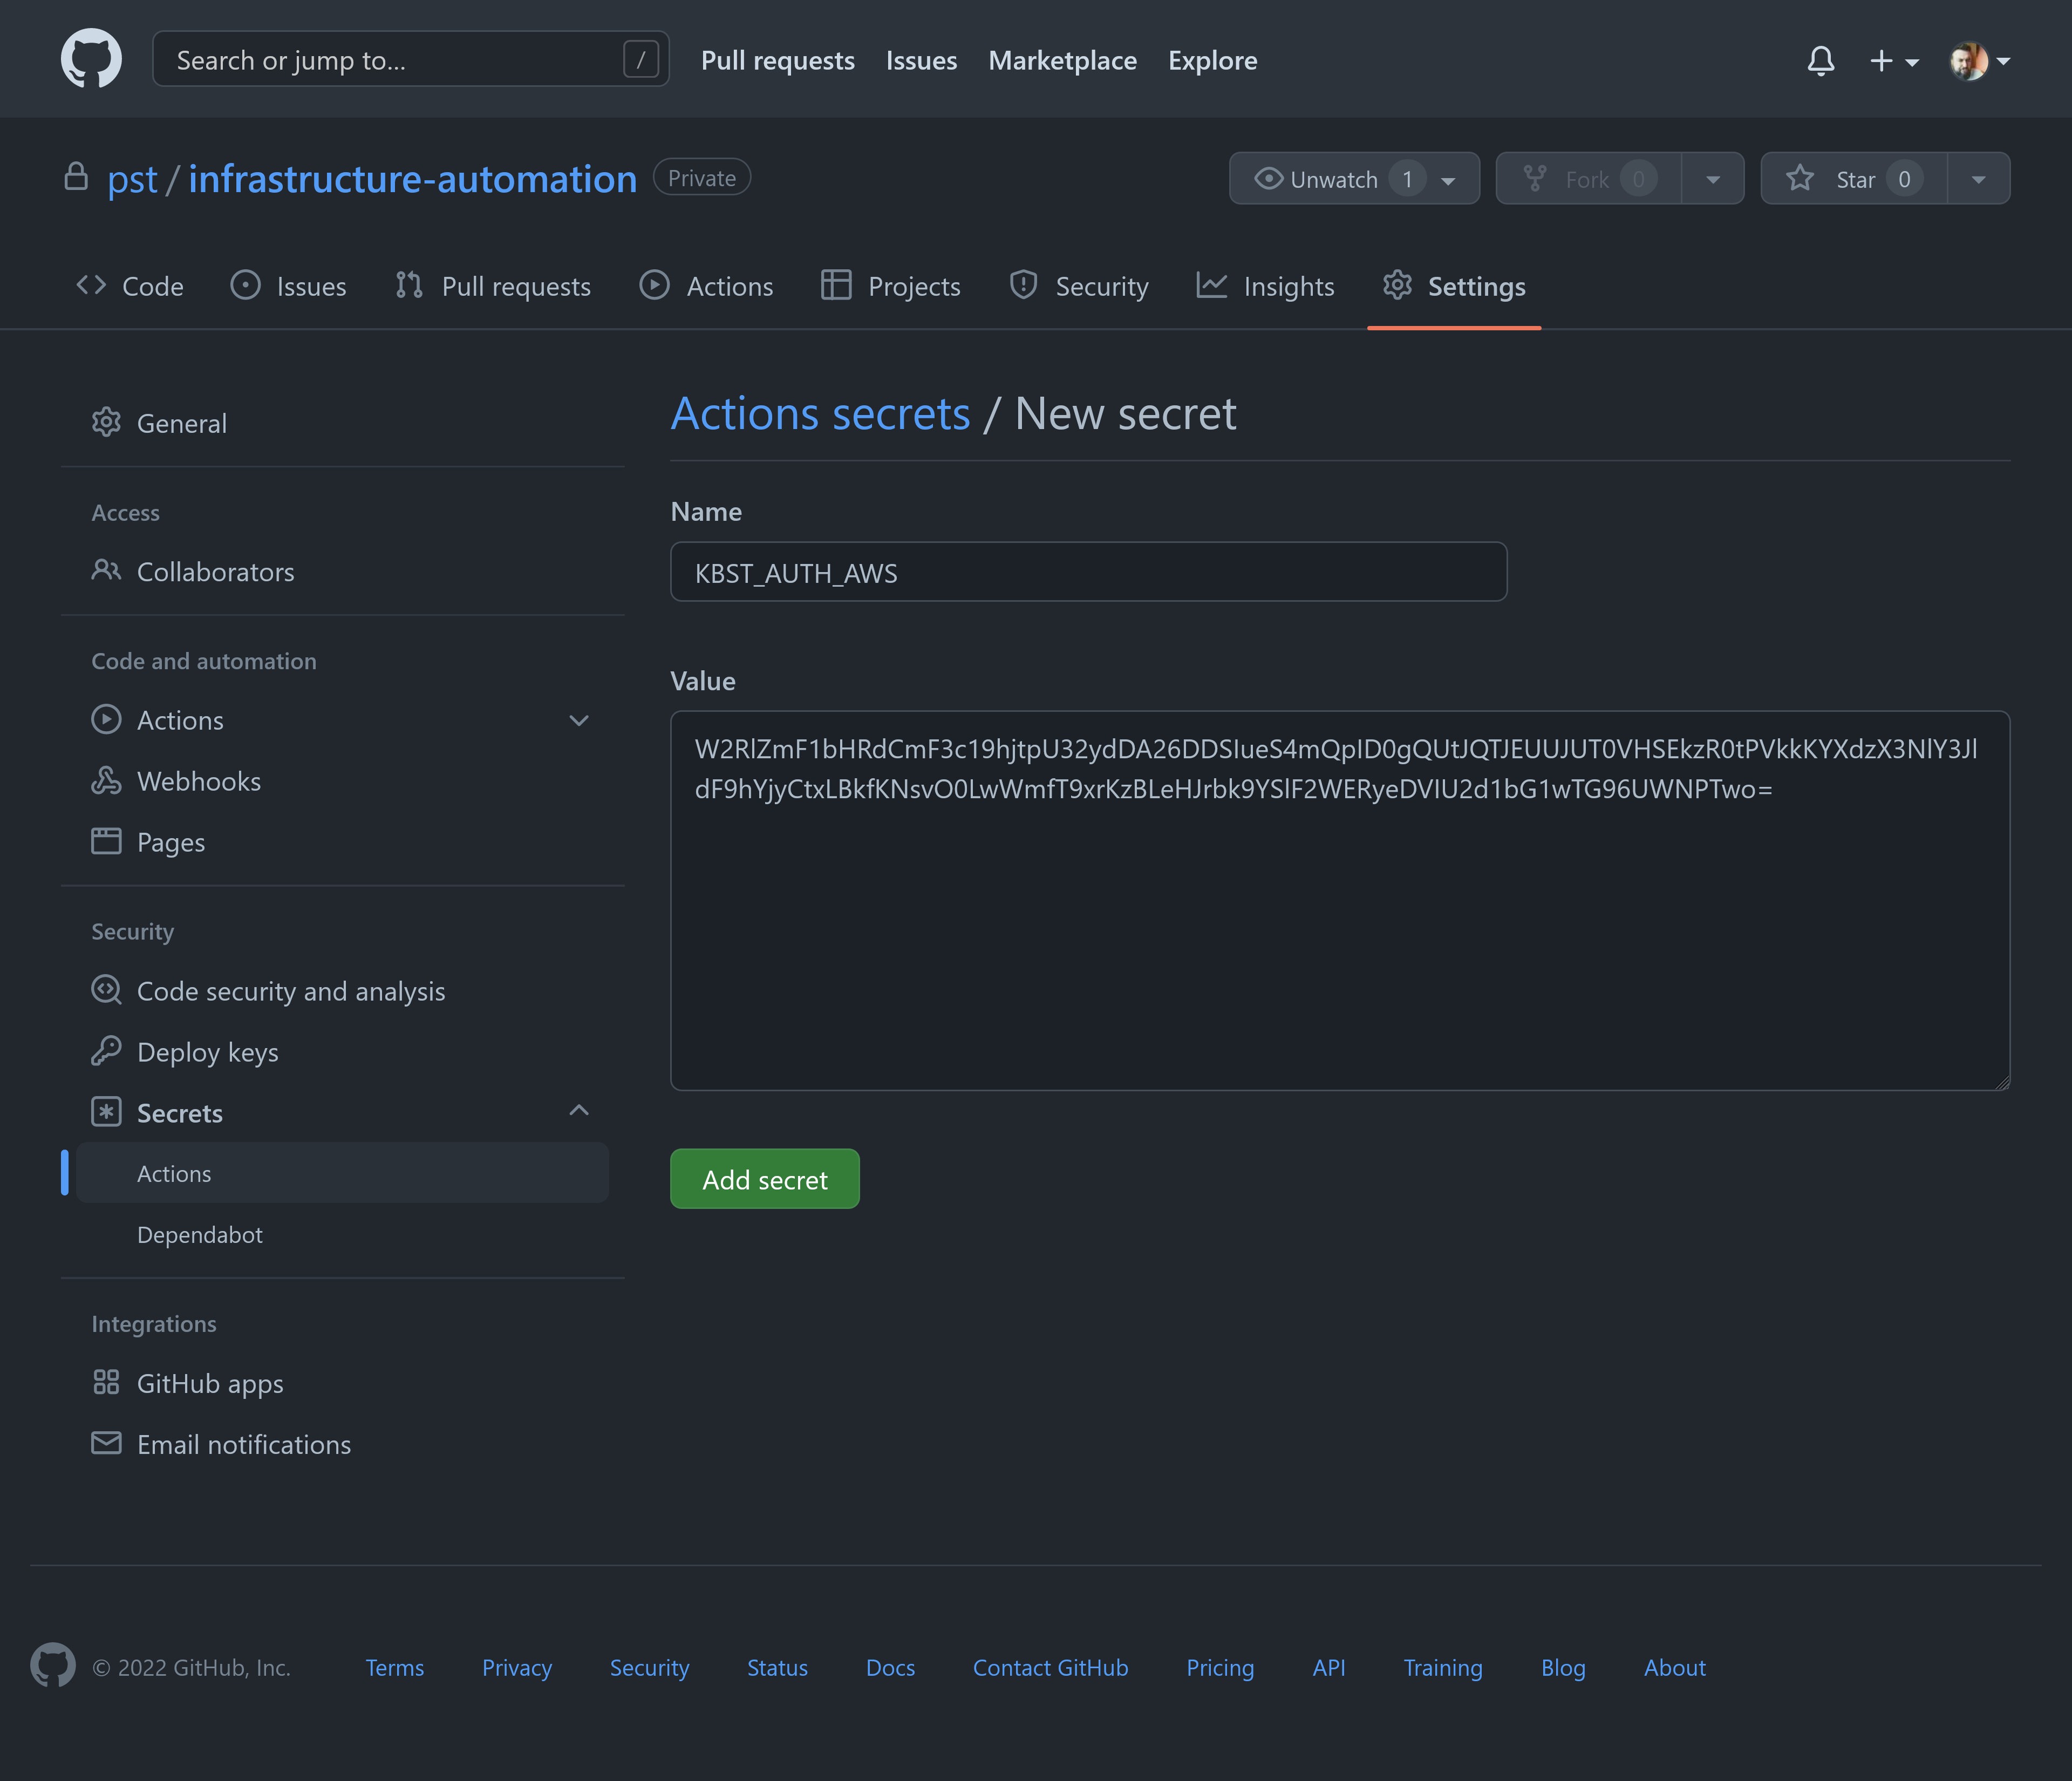
Add the pipeline file
-
First create a new branch to work in.
git checkout -b ghactions -
Add the pipeline as
.github/workflows/main.yaml.mkdir -p .github/workflowscat > .github/workflows/main.yaml <<'EOF'name: deployon:push:branches:- "**" # run for branchestags:- "*" # run for tagsjobs:deploy:runs-on: ubuntu-lateststrategy:fail-fast: falsematrix:environment:- ops- apps# - apps-prod # uncomment if you have three environmentsconcurrency:group: terraform-${{ matrix.environment }}cancel-in-progress: falseenv:KBST_DOCKER_ARGS: --rm -v ${{ github.workspace }}:/infra -e AWS_EC2_METADATA_DISABLED=true -e TF_IN_AUTOMATION=trueKBST_DOCKER_IMAGE: kbst:${{ github.sha }}steps:- uses: actions/checkout@v3### Build image- name: Build imageenv:DOCKER_BUILDKIT: 1run: docker build -t $KBST_DOCKER_IMAGE .### Terraform init- name: Terraform initenv:KBST_AUTH_AWS: ${{ secrets.KBST_AUTH_AWS }}KBST_AUTH_AZ: ${{ secrets.KBST_AUTH_AZ }}KBST_AUTH_GCLOUD: ${{ secrets.KBST_AUTH_GCLOUD }}run: |docker run \$KBST_DOCKER_ARGS \-e KBST_AUTH_AWS \-e KBST_AUTH_AZ \-e KBST_AUTH_GCLOUD \$KBST_DOCKER_IMAGE \terraform init### Select workspace based on matrix environment- name: Select ${{ matrix.environment }} workspacerun: |docker run \$KBST_DOCKER_ARGS \$KBST_DOCKER_IMAGE \terraform workspace select ${{ matrix.environment }}### Terraform plan against current workspace- name: Terraform planrun: |docker run \$KBST_DOCKER_ARGS \$KBST_DOCKER_IMAGE \terraform plan --out=tfplan --input=false### Terraform apply against current workspace# if trigger matches environment- name: Terraform applyif: |(github.ref == 'refs/heads/main' && matrix.environment == 'ops') ||(startsWith(github.ref, 'refs/tags/apps-deploy-') && matrix.environment == 'apps') ||(startsWith(github.ref, 'refs/tags/apps-prod-deploy-') && matrix.environment == 'apps-prod')run: |docker run \$KBST_DOCKER_ARGS \$KBST_DOCKER_IMAGE \terraform apply --input=false tfplanEOF
You may have noticed, that the example pipeline only handles the ops and apps environments.
If you additionally have the apps-prod environment, you must uncomment the respective line under jobs.deploy.strategy.matrix.environment.
And if you changed the environment names, now is the time to adjust the pipeline to match.
Follow the GitOps process
-
Add, commit and push the pipeline.
git add .git commit -m "Add Github Actions pipeline"git push origin ghactions -
Open a pull request.
The
git pushto GitHub will return a covenient link to create a new pull request. Go ahead and open a pull request.# [...]remote:remote: Create a pull request for 'ghactions' on GitHub by visiting:remote: https://github.com/pst/infrastructure-automation/pull/new/ghactionsremote:To github.com:pst/infrastructure-automation.git* [new branch] ghactions -> ghactions -
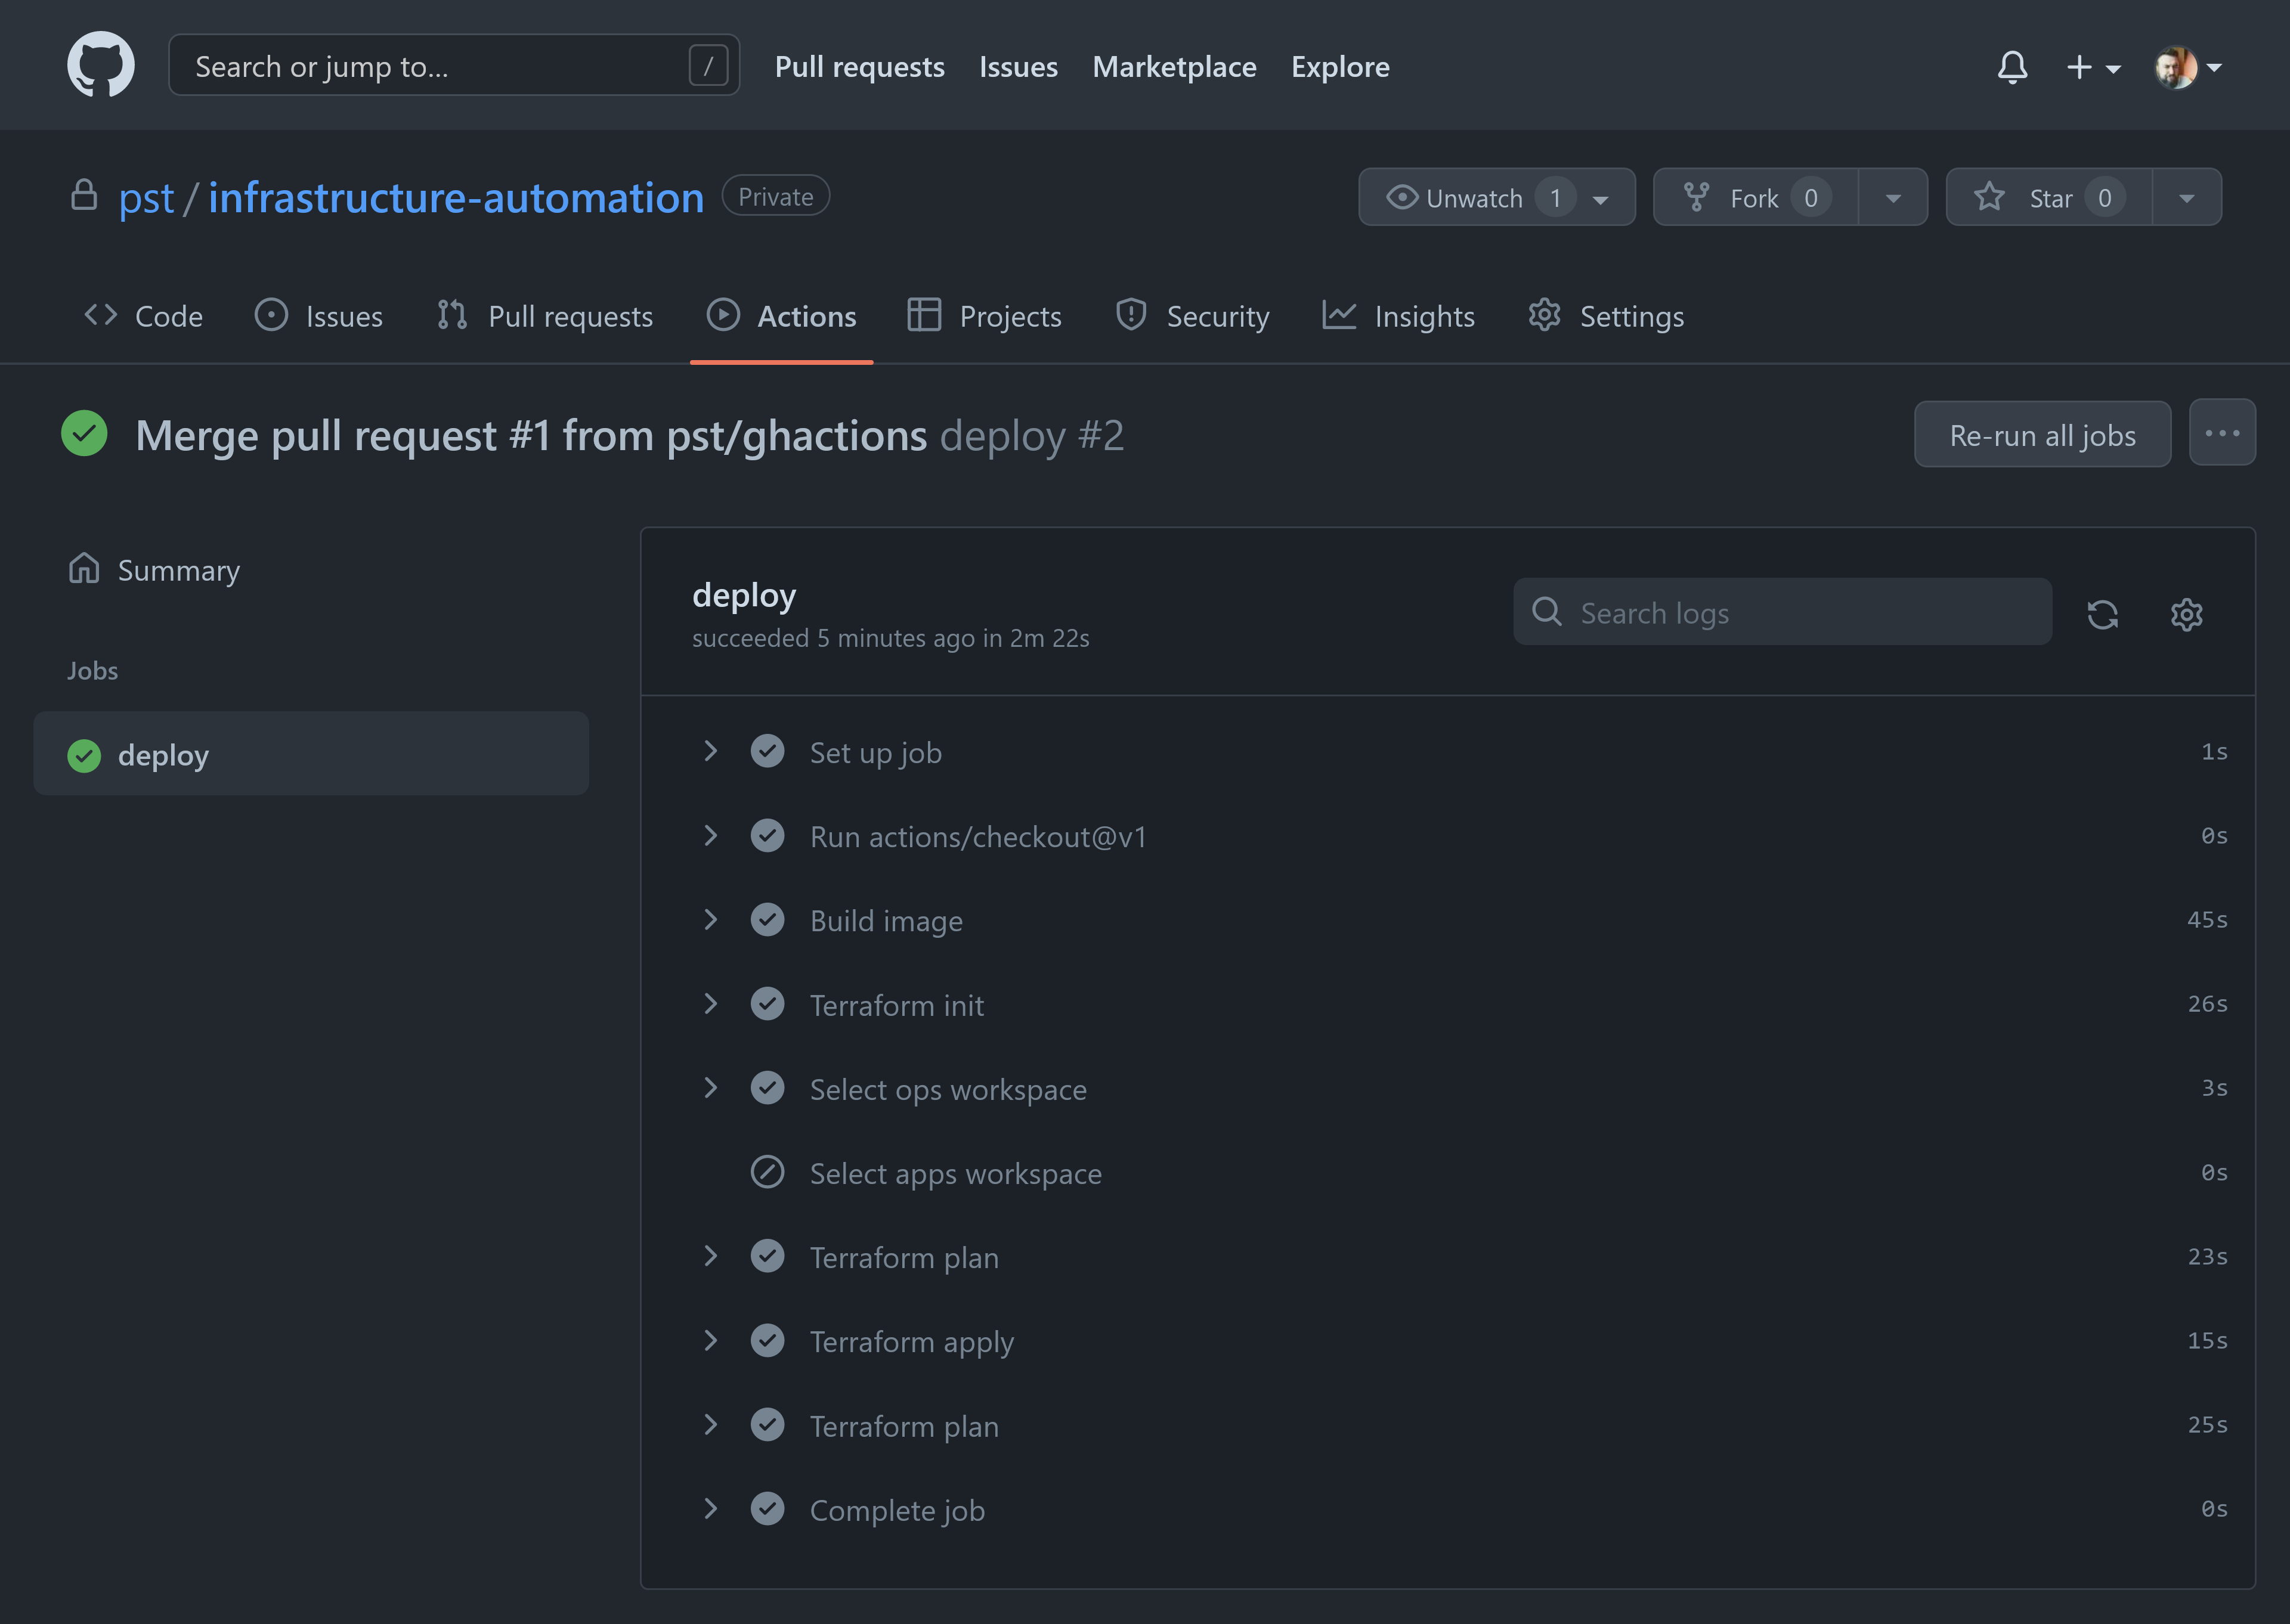
Check the pipeline run.
The pipeline run for the
ghactionsbranch does not apply changes. It only provides the output ofterraform planagainst the ops workspace to determine what changes will be applied once merged.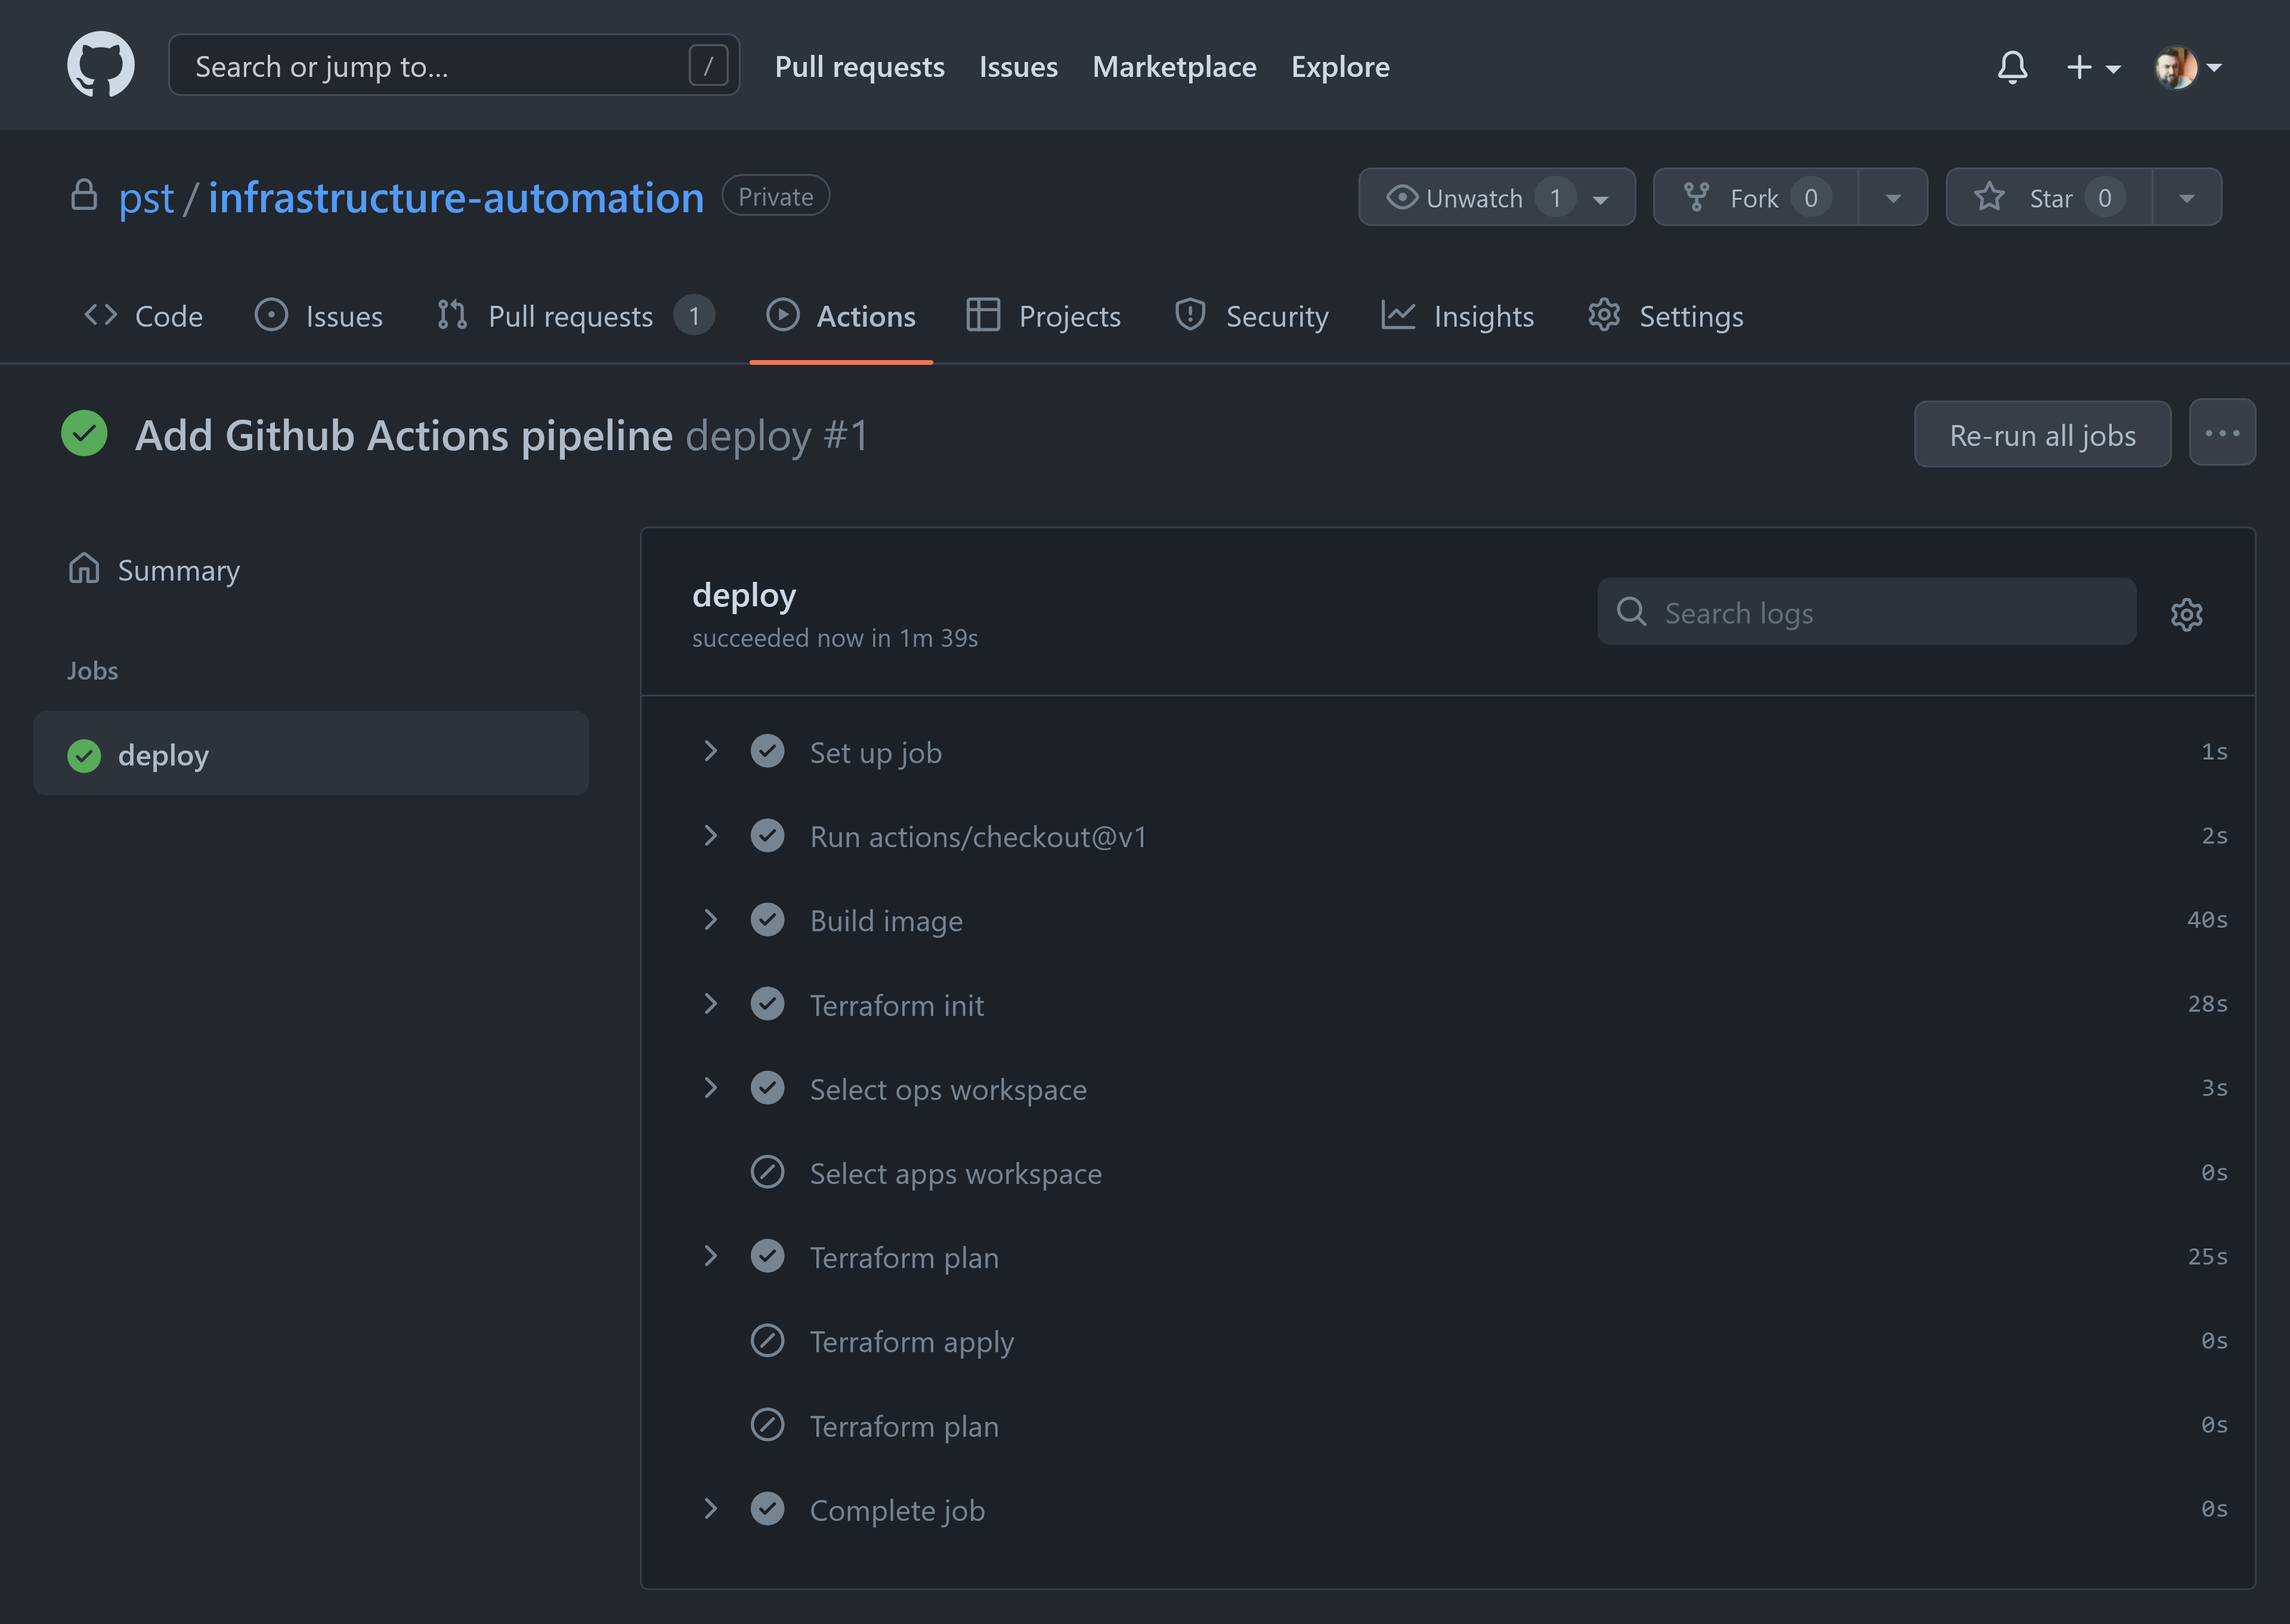
Since we already bootstrapped the clusters, the pipeline at this point has no planned changes.
-
Merge the pull request to apply changes to ops.
Merge the pull request into main. The pipeline applies changes against the ops workspace on every commit to main.
-
Finally, set a tag to apply changes to apps.
# checkout the main branchgit checkout main# pull changes from origingit pull# tag the merge commitgit tag apps-deploy-0# push the tag to origin to trigger the pipelinegit push origin apps-deploy-0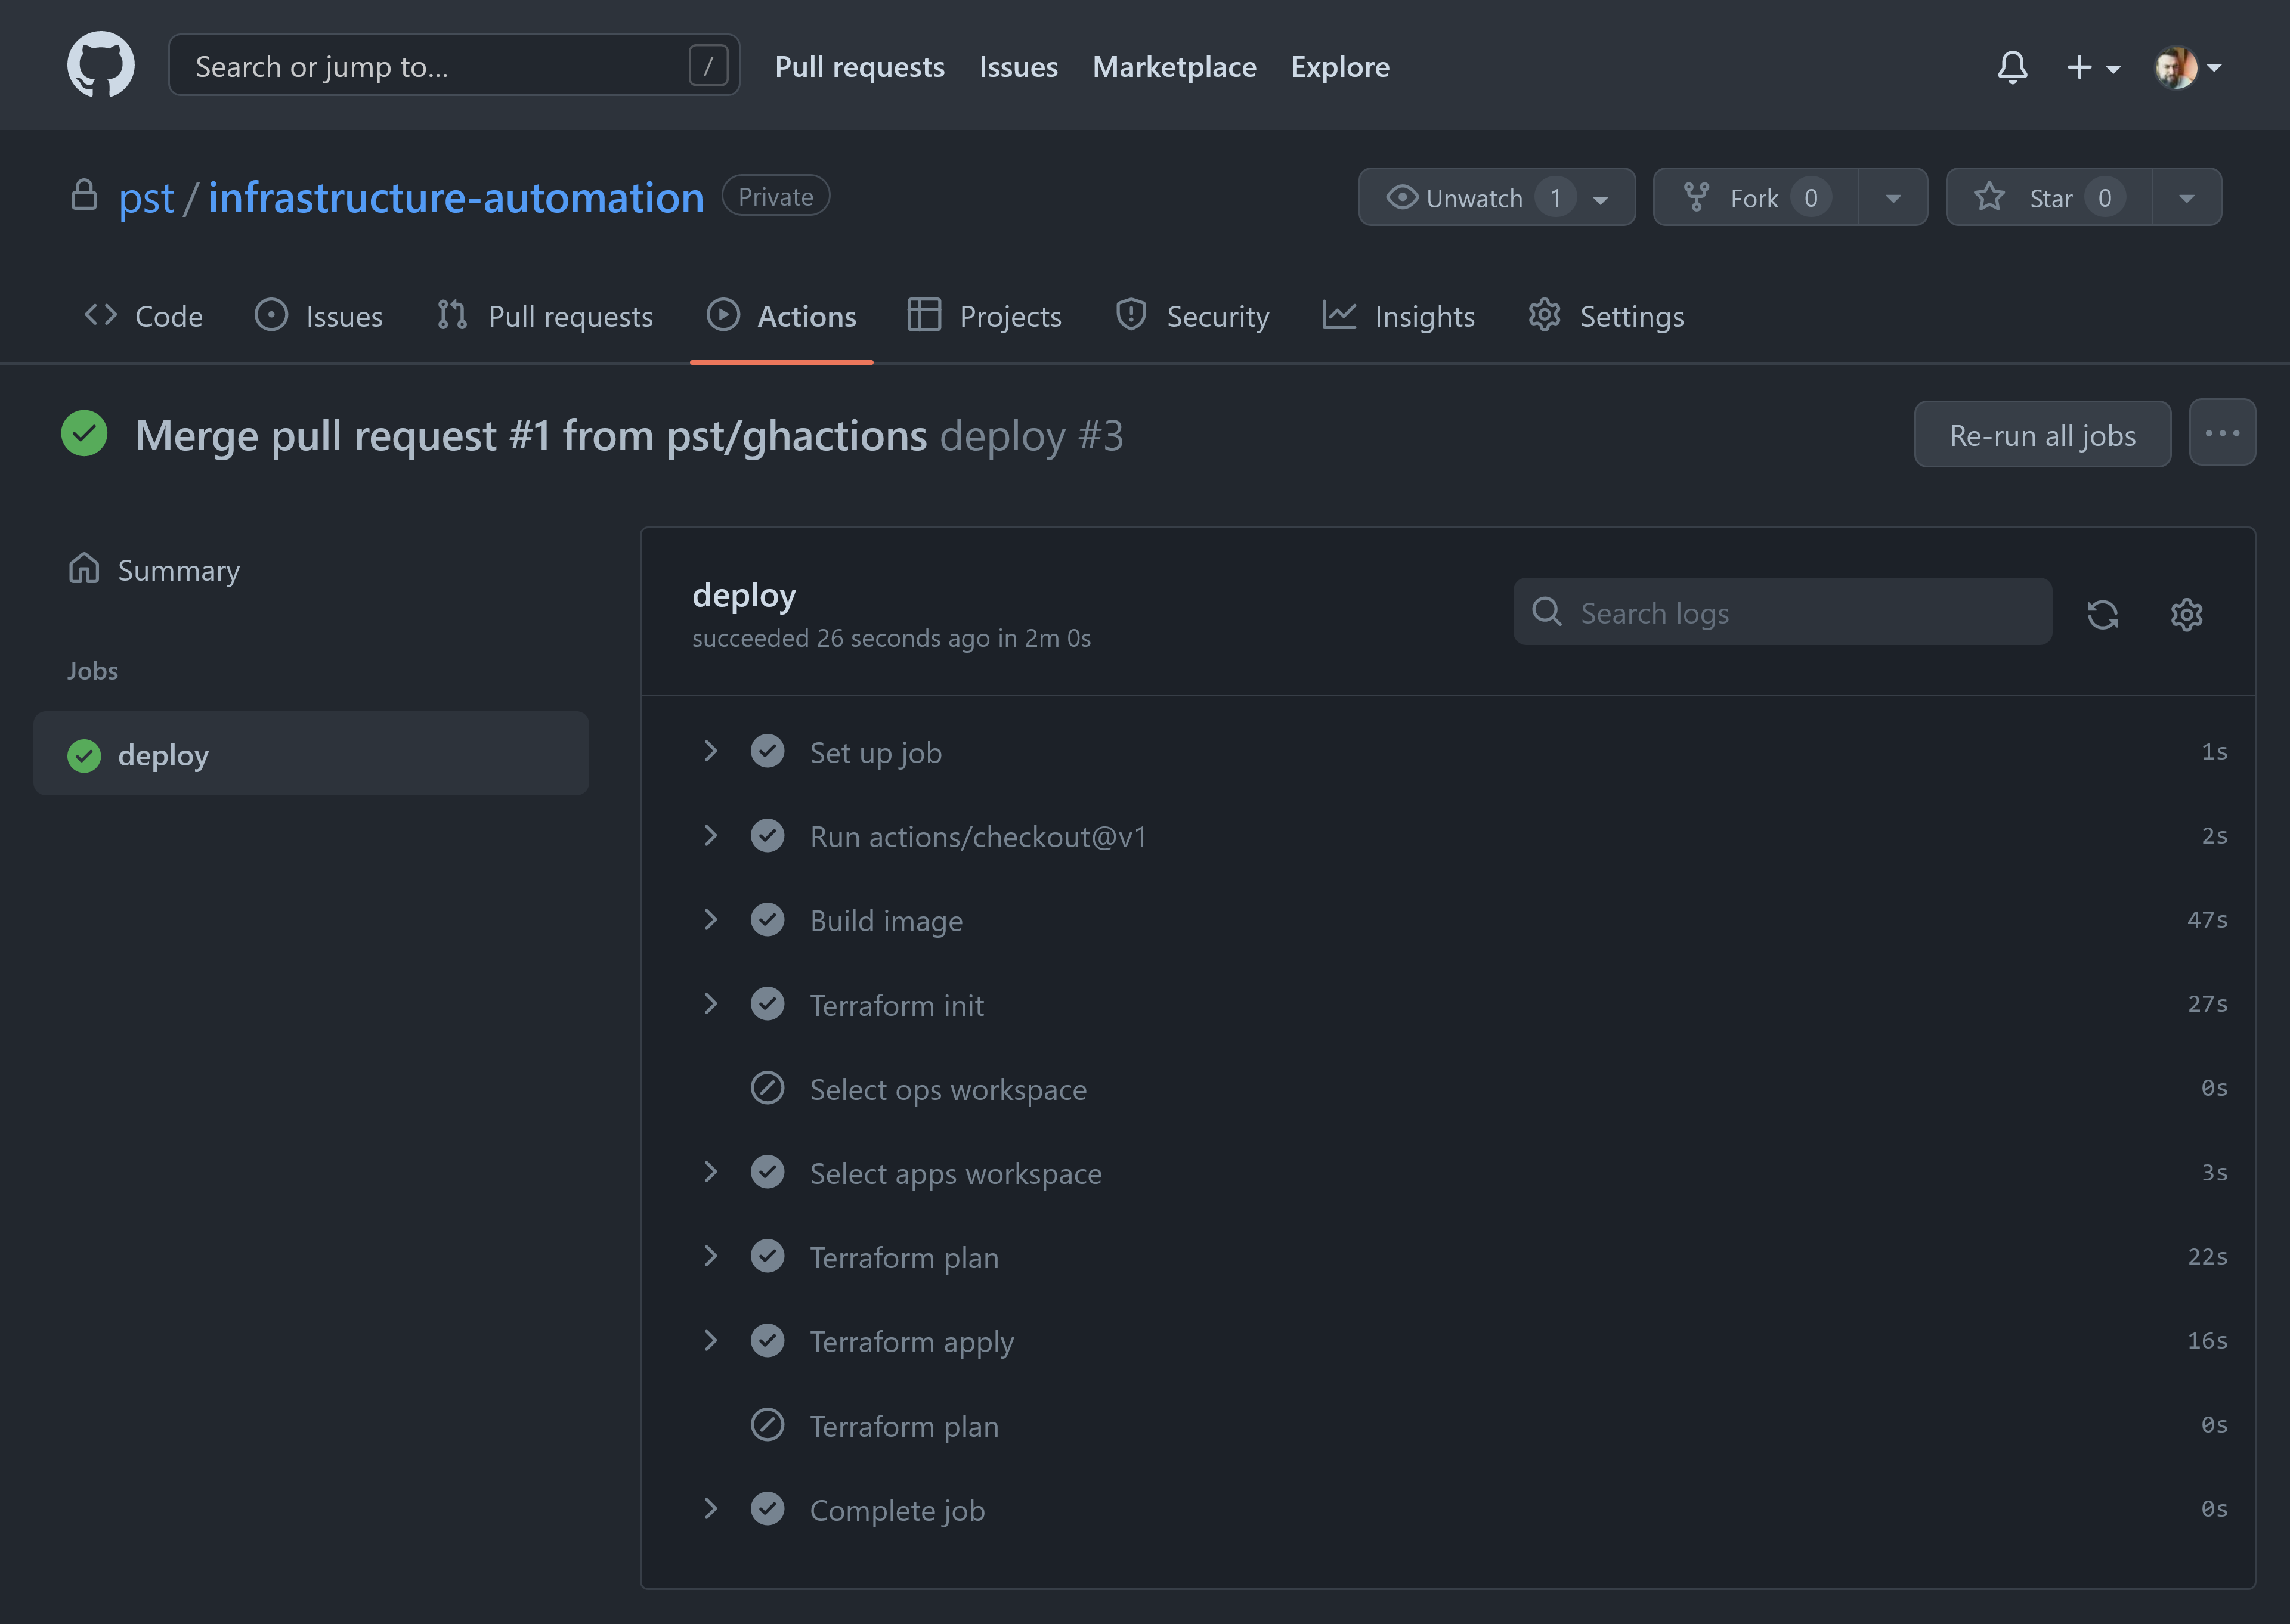
Compare the output of the three pipeline runs. You will see how when triggered from a feature branch, triggered from the main branch or triggered from a tag the pipeline behaves differently.
For more details refer to the GitOps Flow making changes section.
Recap
To recap:
- You bootstrapped a local repository.
- Created prerequisites like the Terraform remote state and the identity for the automation runs.
- You provisioned the ops and apps and potentially apps-prod infrastructure environments.
- You linked your repository to trigger automated pipeline runs.
Congratulations, you now have fully GitOps automated Kubernetes infrastructure.
Next steps
With your clusters provisioned, it's time to start building out your platform features. Kubestack has a number of step-by-step guides for common tasks using Kubestack's integrated platform service modules.
Community Help: If you have any questions while following these guides, join the #kubestack channel on the Kubernetes community. To create an account request an invitation.
Kubestack Guides
The DNS, Nginx ingress and Cert-Manager guides combined allow you to expose applications outside the cluster with certificates issued by Let's Encrypt automatically. They will also show you how cluster infrastructure and platform services modules are integrated with each other to allow you to maintain your entire platform stack from a unified Terraform code base.